We didn’t want just any firepit, we wanted one that looked great. The nice ones are very expensive, the cheap ones would do but look cheap, and the project ones I saw also used expensive custom parts. My goal was to come in around the same price as the low-end fire pits, but have something much more custom and impressive.
I found this video below as an example of the style of fire pit we wanted, and all of the build steps were reasonable. The only catch was the gas install kit, burner, and fire pan used would be almost $400 alone – and this was bigger than we needed. Most of my process and steps were modeled after this video.
Parts & Tools List
Tools
These are all the tools you’ll need, no Kreg-jig necessary. The only new tool I really needed that made things easier was a step-bit for drilling more precise holes in the metal pan.
- Circular Saw
- Table saw (optional)
- Power drill
- Something to mix concrete in
- Crescent wrench (2)
- Caulking gun
- Step drill bit (included in my cost-out)
- 1 1/4~1 1/8″ hole saw or paddle bit
Parts
Parts list is below, majority of the fire-pit parts are from Amazon, but a few things you’ll need from your favorite hardware store. (Amazon links are affiliate links, Home Depot links are just for reference)
Building the top
Form
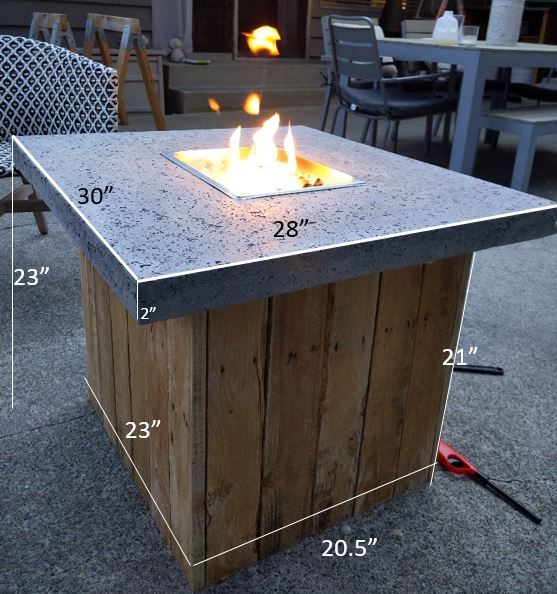
This size of fire pit is probably about the minimum size based on the room you need for this pan and a propane tank. This would be very easy to scale-up using a larger pan and any alternative dimensions you may want to fit your space.
Note: I made my form to have the top slab of 2″, this is likely more than you need and could likely get away with a 1 1/2″ slab.
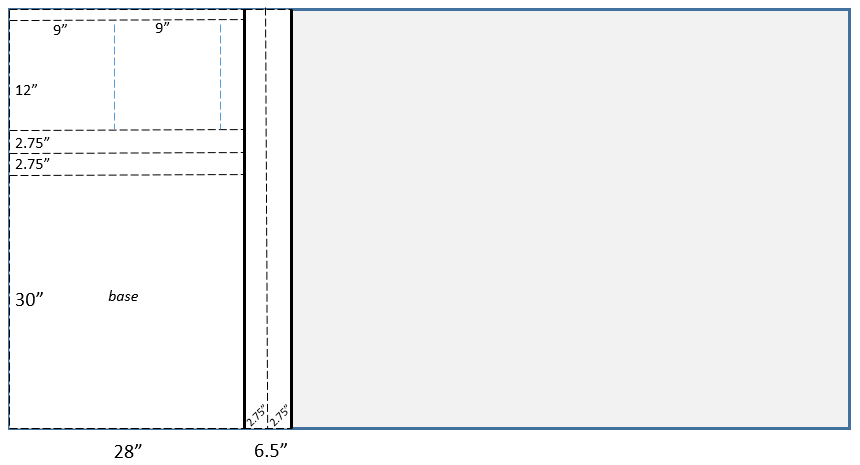
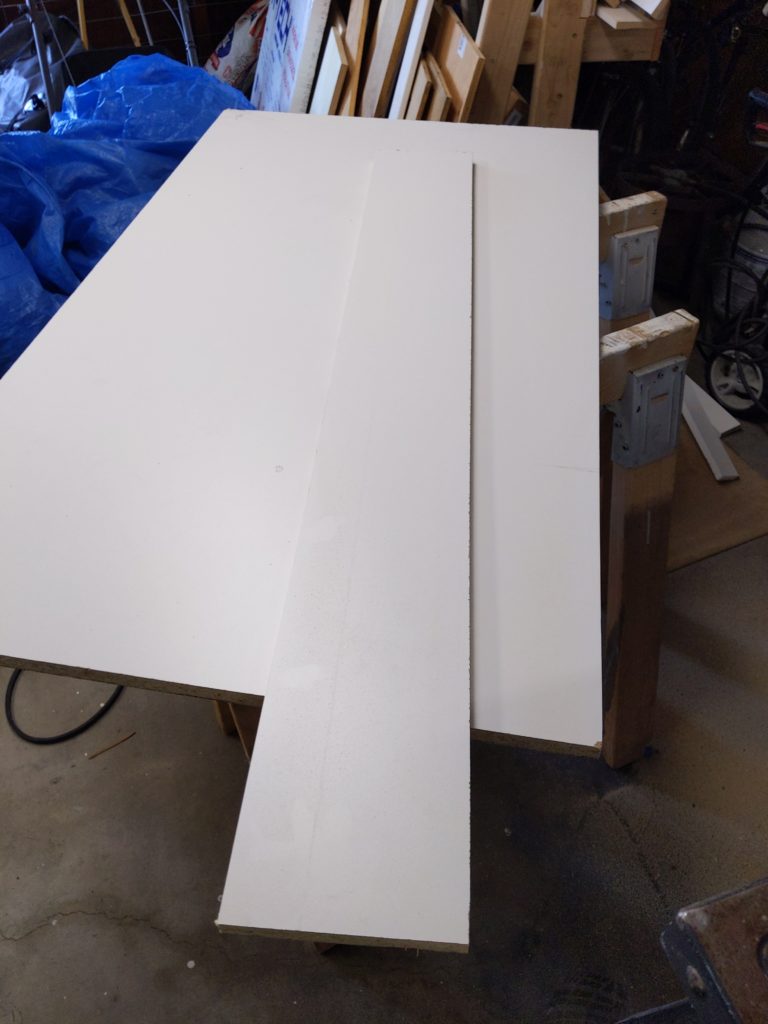
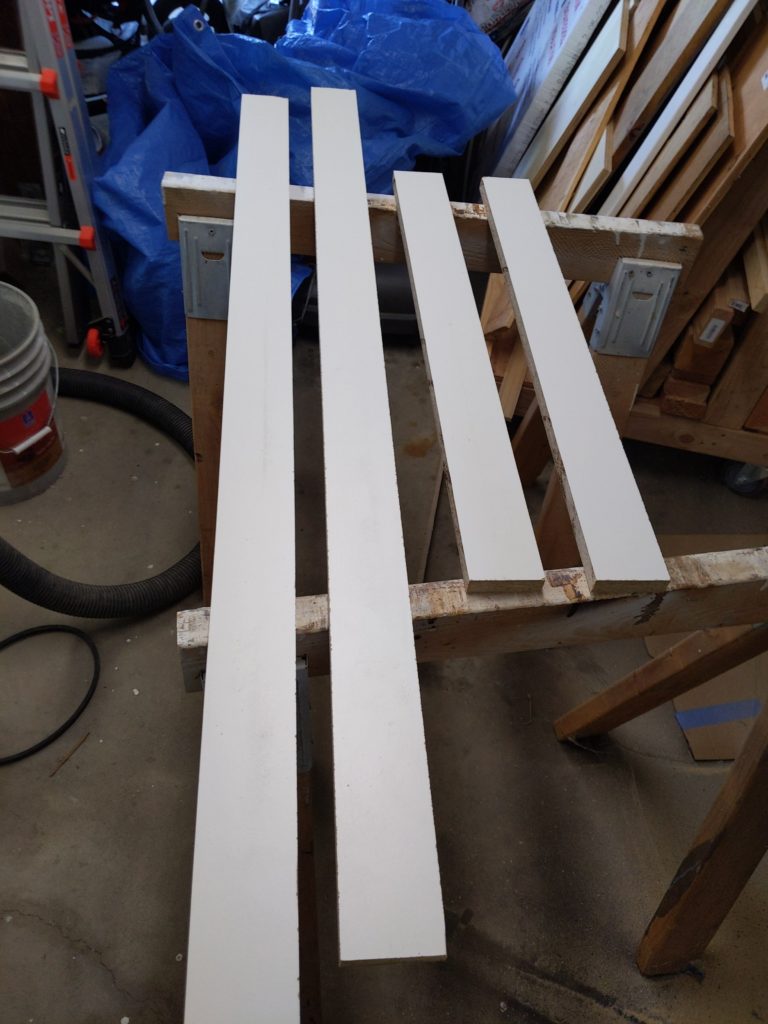
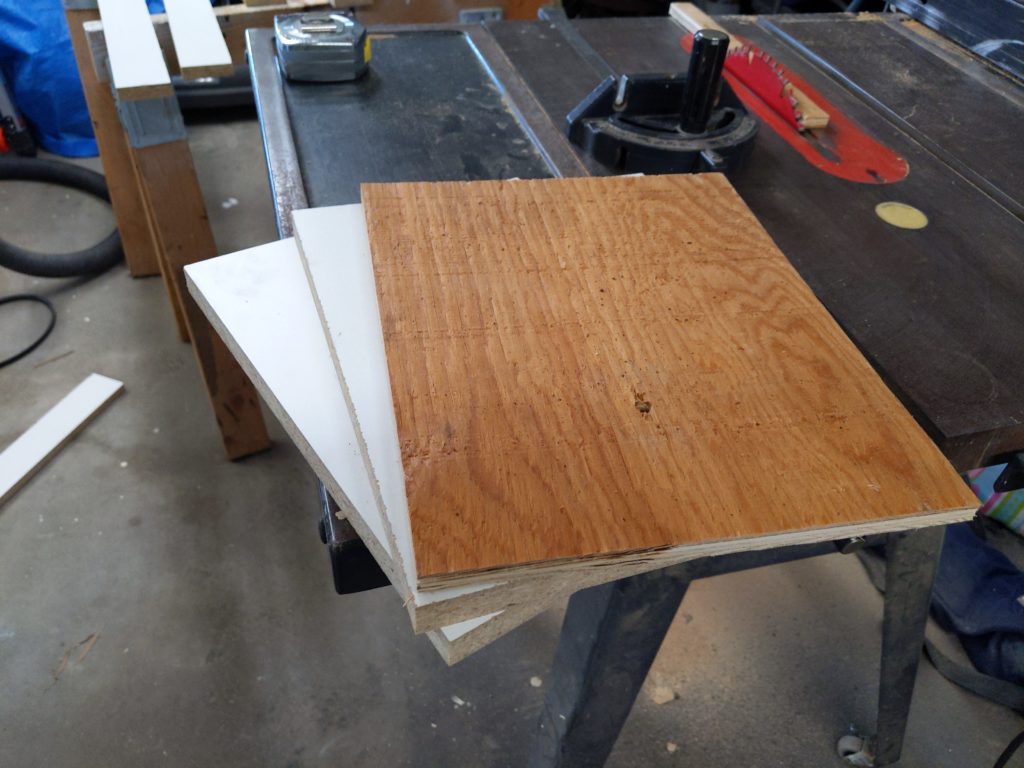
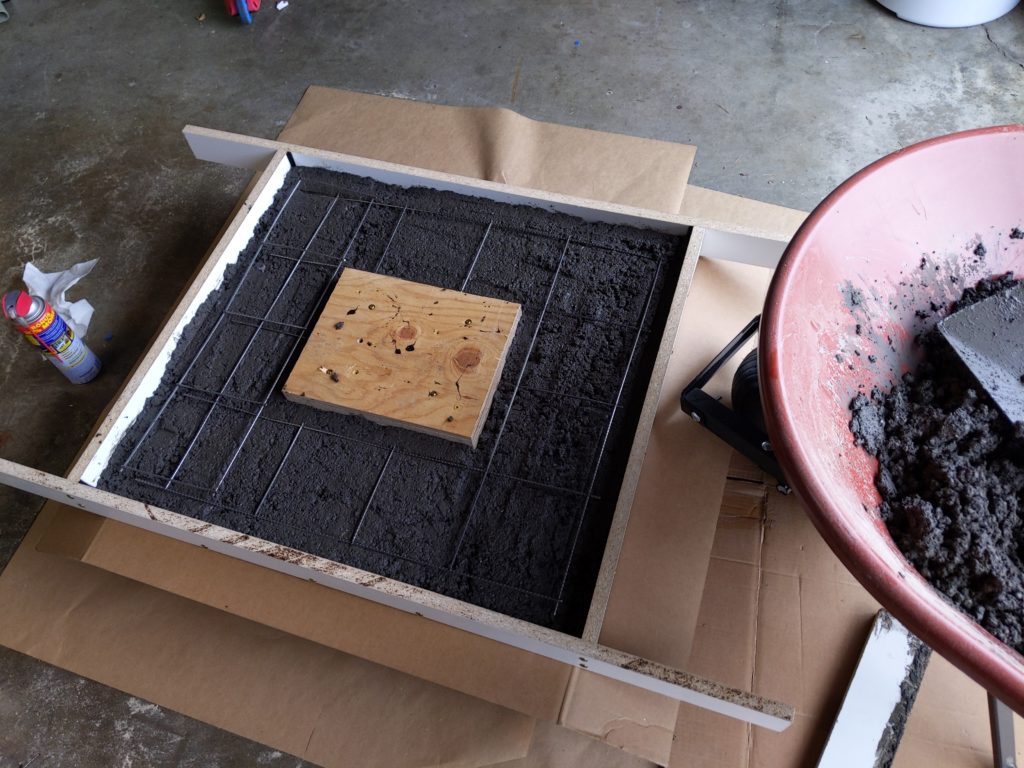
Begin cutting all the pieces for your form, the most important being the square for the bottom that will be the full size of your table. When cutting the sides you can make two the exact width of one dimension of your top, then the other two can just extend past either side – this makes it easier to assemble, cut, and provides leverage when disassembling the form.
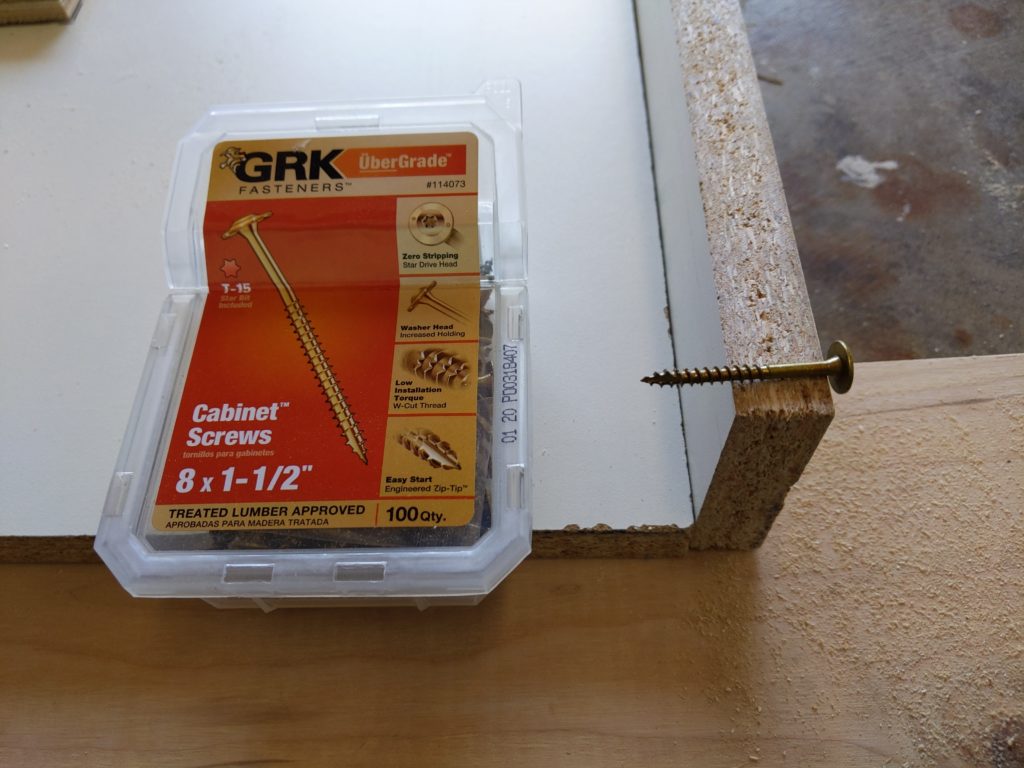
I followed the video and made the center-hole out of a stack of particle board the size of my hole, this way it can be screwed from the top together. Using packaging tape around the edges of this made for a very smooth inside edge and release from the form. I did have to use a 1/2″ piece of scrap plywood to make the full 2″ – this is where only doing it 1 1/2″ thick would save you a step.
The self-tapping cabinet screws worked very well for the particle board and I didn’t have any splitting. I didn’t use more than about a screw every foot, and a few at each corner.
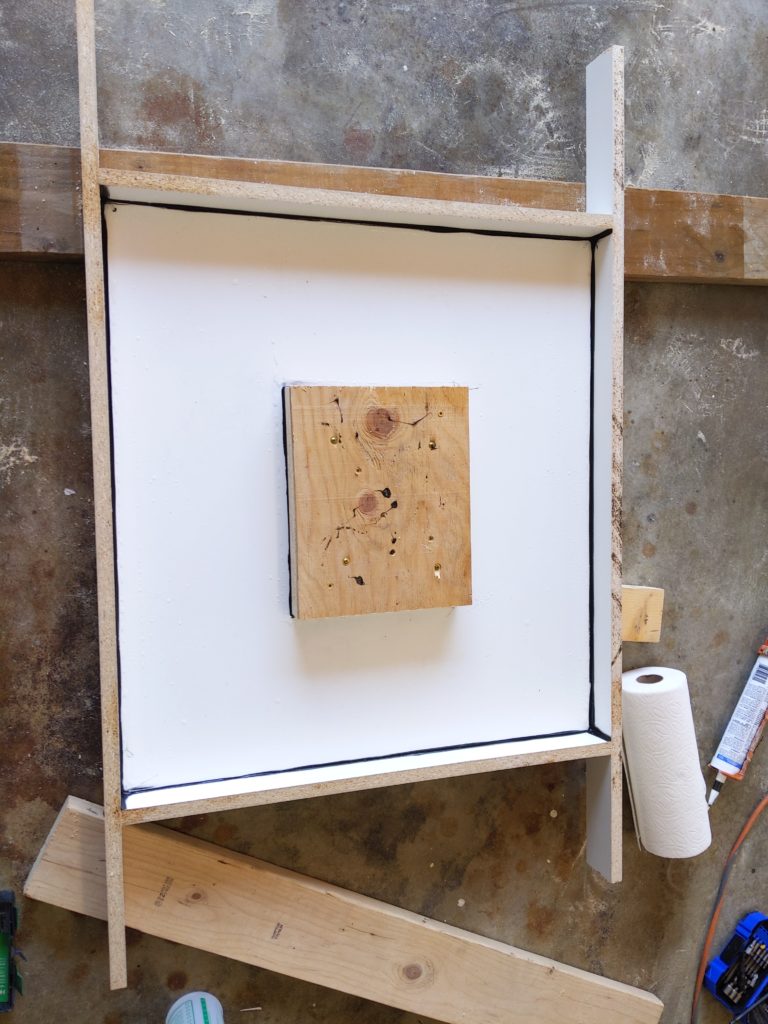
With your form assembled you’ll now seal all the corners with the 100% silicone caulk, any color will do but the black on white is easy to see where you put it. You can use a fancy caulking scraper, or just your finger/gloved finger but spraying water over the caulk does make this really easy to get a clean line. I’d always heard that’s how you can do it with 100% silicone and makes tub caulking easy – it’s true and I’ll try that next time I re-do the bathroom. Many other projects I saw also used some kind of form release – typically WD-40 which I sprayed on and spread with a paper towel to lightly grease all the melamine.
Cement
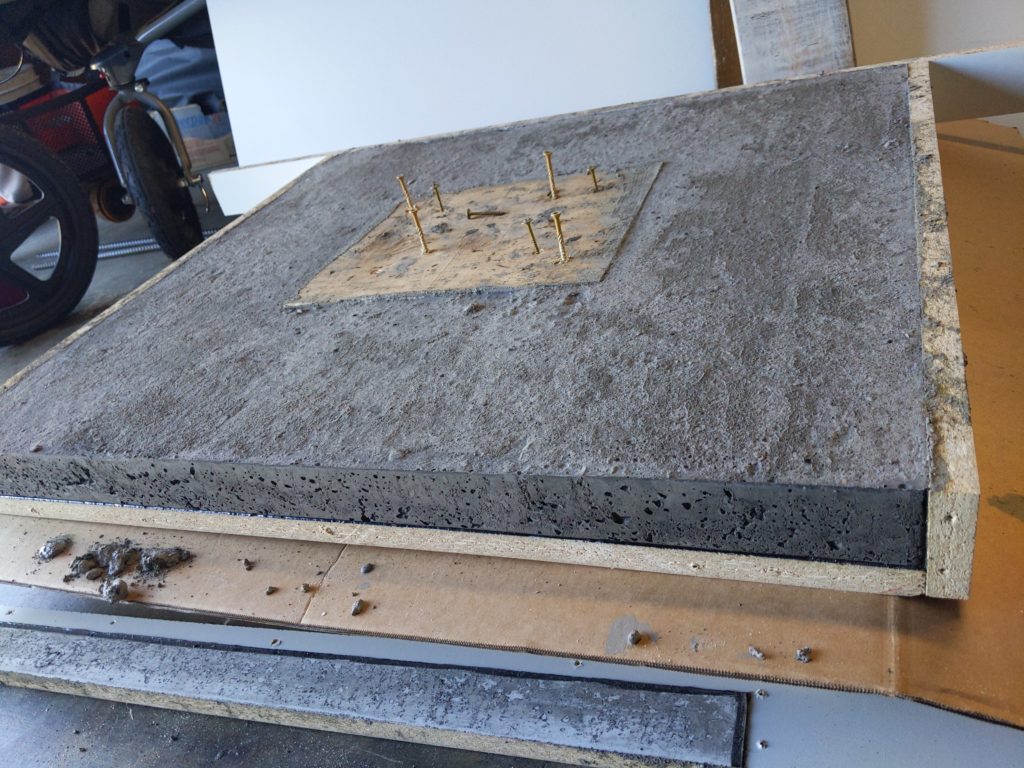
This is where I’ve seen a lot of variation in the DIY project fire pits, the video I found used mortar mix, and plenty of others used plain concrete. The mortar mix seemed expensive for what I wanted, but I do think it will give you a much smoother finished product immediately out of the form. Even vibrating mine with a reciprocating saw I still had a lot of air bubbles in the top and edges that I’ll need to fill to have smooth. Using a slightly more watery mix may also help with final results. Consider this knowing you may either have an extra step at the end, or more cost up-front. I went with high-strength fiber reinforced just because that sounded right knowing I’d be doing a minimum 2″ slab. For color I used the charcoal dye to darken it a little, it will dry much lighter than it looks.
For this exact size, I had to use about 1 1/2 80lb bags of my cement, this is where if you only did a 1 1/2″ slab you might be able to just get away with one. I mixed them separately knowing variations wouldn’t show much and the first bag would fill the majority of what you’ll ultimately see. Mix to directions and begin pouring into your form. Get one layer down about 1/3 of the way then put in your wire re-mesh. I cut this out as you’d expect, and used two pieces to ensure I had mesh throughout and surrounding the center hole. Spend some extra time making sure the cement settles around the aggregate in the corners, this is another spot I had some larger gaps in the end.
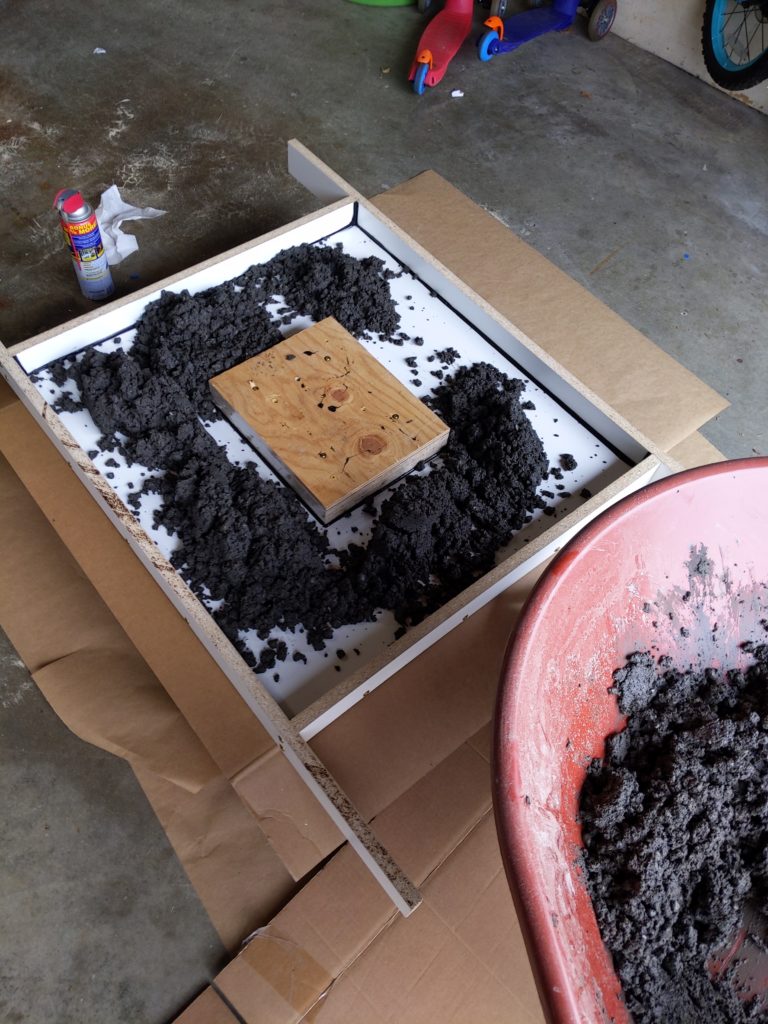
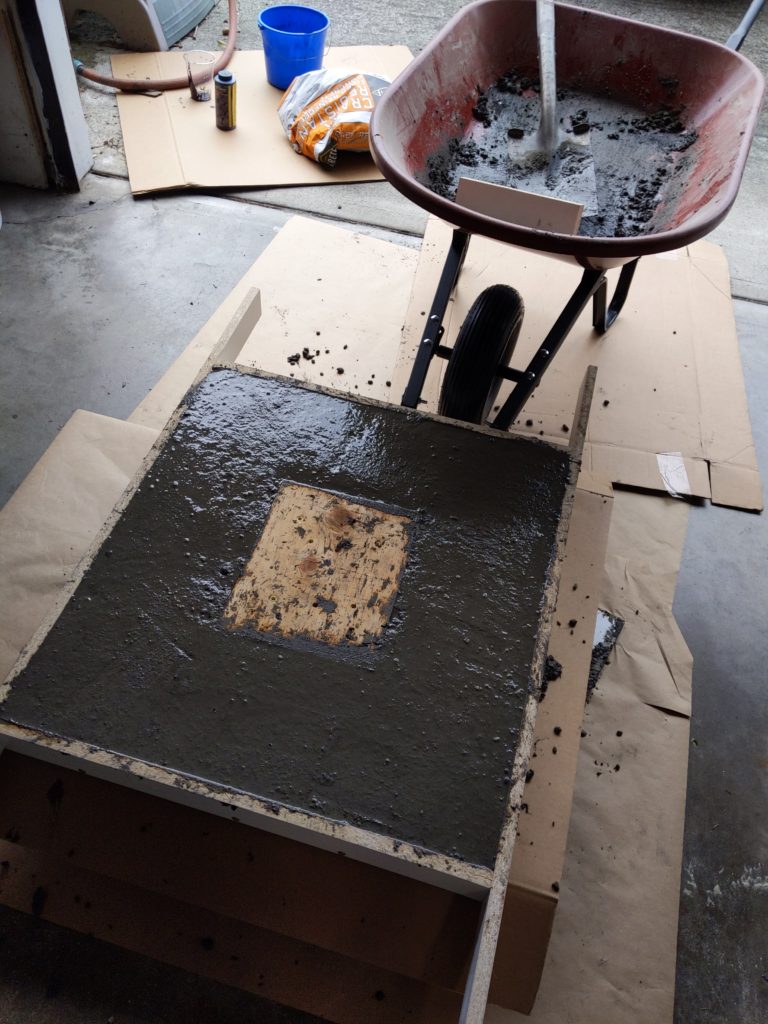
Finish filling the form and screeting off smooth, I did use my reciprocating saw with no blade to try and vibrate out bubbles – not sure how much this helped. I did cover the top with a garbage bag to ensure it would cure evenly and not crack, I wetted the top with a spray bottle a few times over the next day as it dried. It probably took about 2 days to seem completely dry and as things got busy it ended up sitting for about a week.
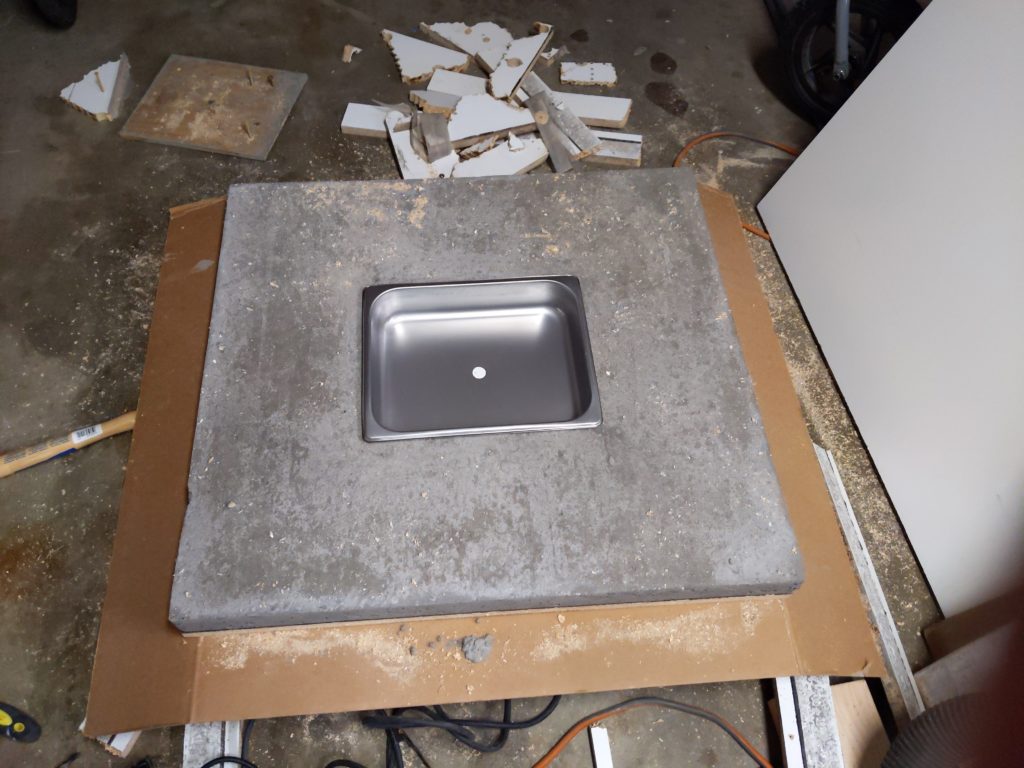
Dismantle your form by unscrewing and pulling apart the sides. I was surprised how much the silicone itself held on some of the forms. You will need to do a little work to release the center form, I decided to leave it on the main form bottom, and remove it from the middle by drilling holes and making releif cuts to chip it away in smaller pieces. It might go fine to remove it from the base and pop it out – but I didn’t want to risk cracking/breaking.
Burner/Tray
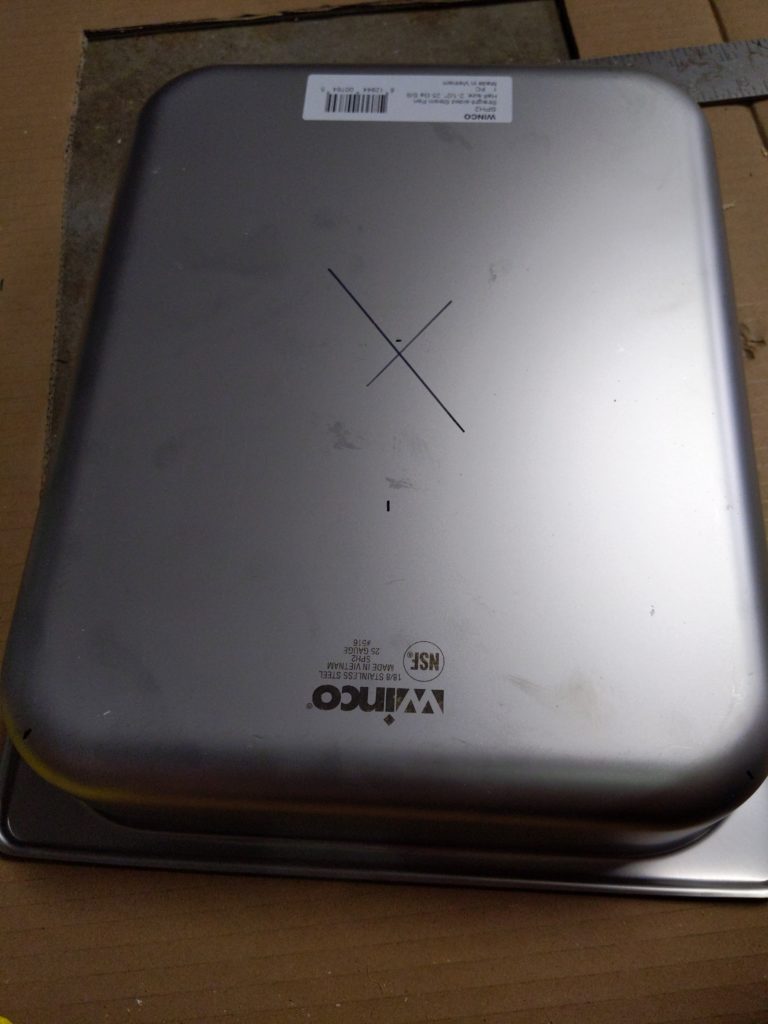
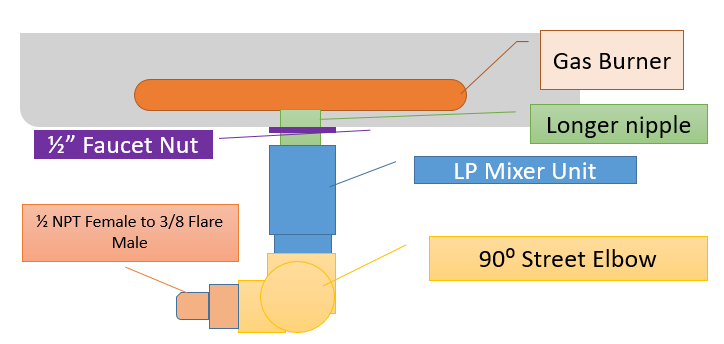
For the tray, try to find the center point by drawing lines on the diagonal. Use the step bit with some 3 in 1 oil or WD-40 to cut the hole to just large enough for the nipple of the expansion chamber to fit through the hole.
Depending on the air mixer you get, I ended up switching out one of the pipe nipples for a slightly longer one to give me enough space to screw the burner on tight, and use the pipe lock nut for a secure fit.
The rules of gas piping for this that I’ve seen are:
- Compression fittings don’t need any type of joint sealant
- NPT fittings should use a joint sealant, for the pipe thread tape the directions are a minimum of 4 wraps.
Assemble the burner to the 1/2 NPT to 3/8 flare, and then assemble your gas valve with other connections. You’ll tighten up the burner in place before you make your final connection.
Table Base

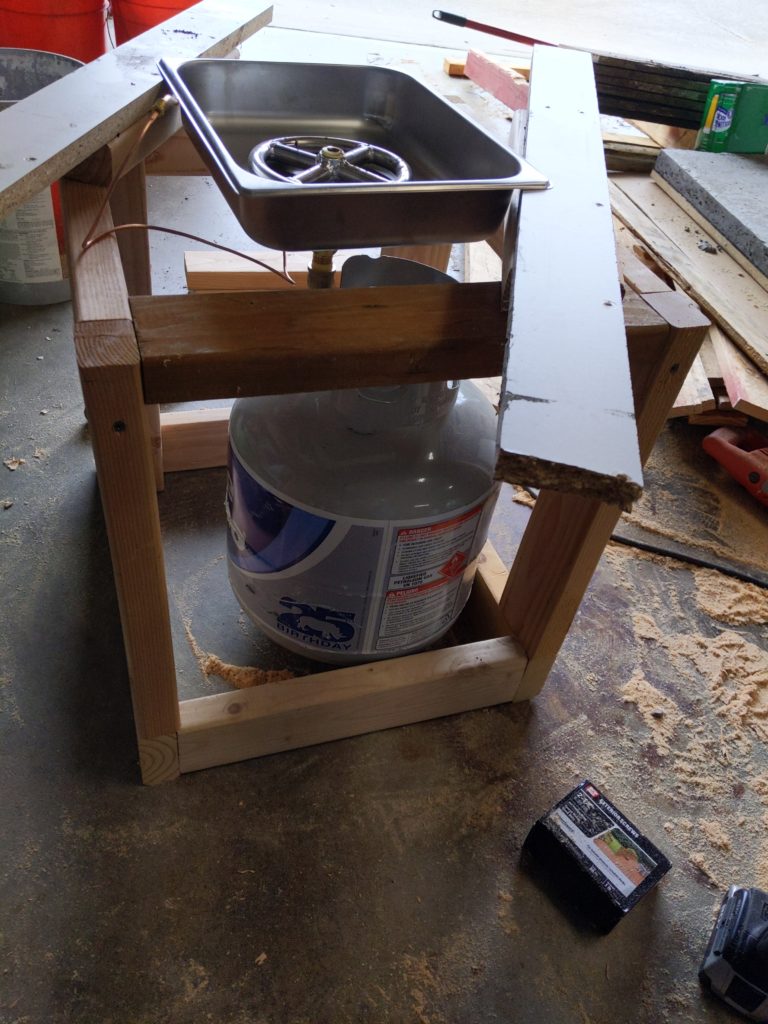
There is nothing magical about the base, other than it needs to be sturdy enough to hold the top, and big enough to allow room for the propane tank. I used about 3 2x4s to construct a frame and used these main principles to put it together:
- I wanted it flush around the top and bottom to attach the outside walls to.
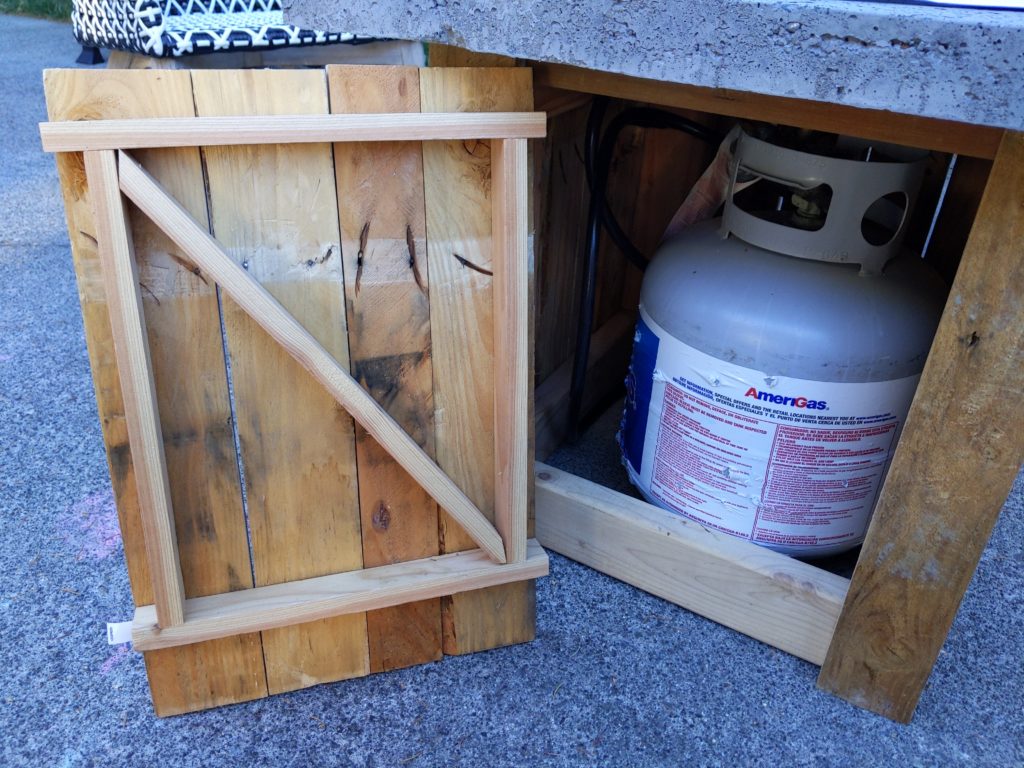
- I used 2x4s on their side for one end, to provide more clearance to get the propane tank in and out.
- The thickness of your top slab, and depth of your fire-pan will determine the right height based on about 1″ of clearance between the bottom of the pan and the propane tank.
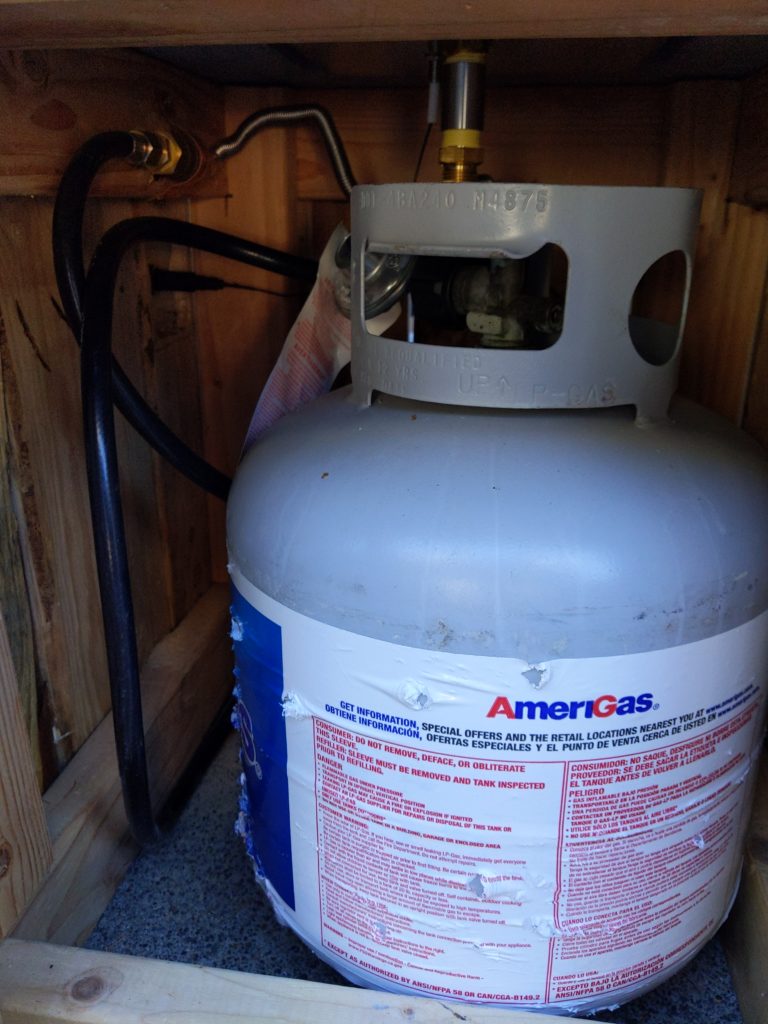
- It should be wide enough to maneuver the propane tank in and around the air mixing valve.
- Based on minimums above I settled on an even 3.5″ finished overhang of the table top and made the base accordingly (taking into account thickness of my pallet wood for the outside). My frame without the pallet wood was 21.5″ (w) x 19″ (d) x 21″ (h).
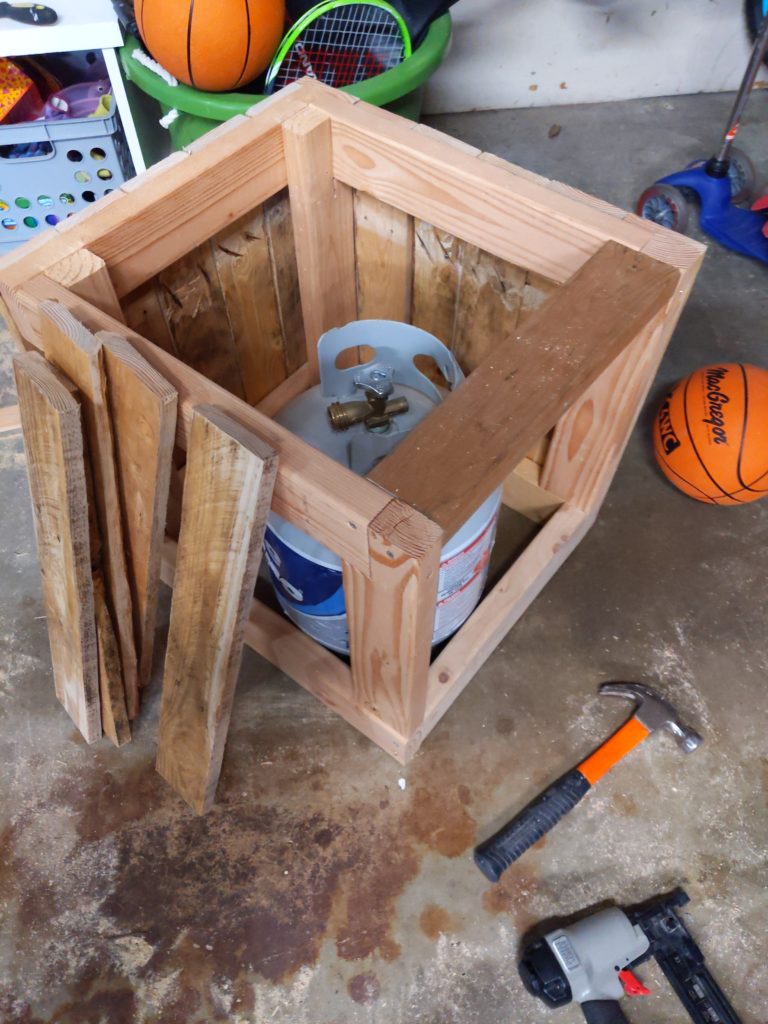
I had a nice pallet from concrete that had a lot of boards that I harvested to use for our sides. You could use anything like siding, fence boards, or sheet materials for the look you want. I built a frame out of 1x2s to fit inside the wider opening for the propane tank so the entire side can be removed.
Assembly
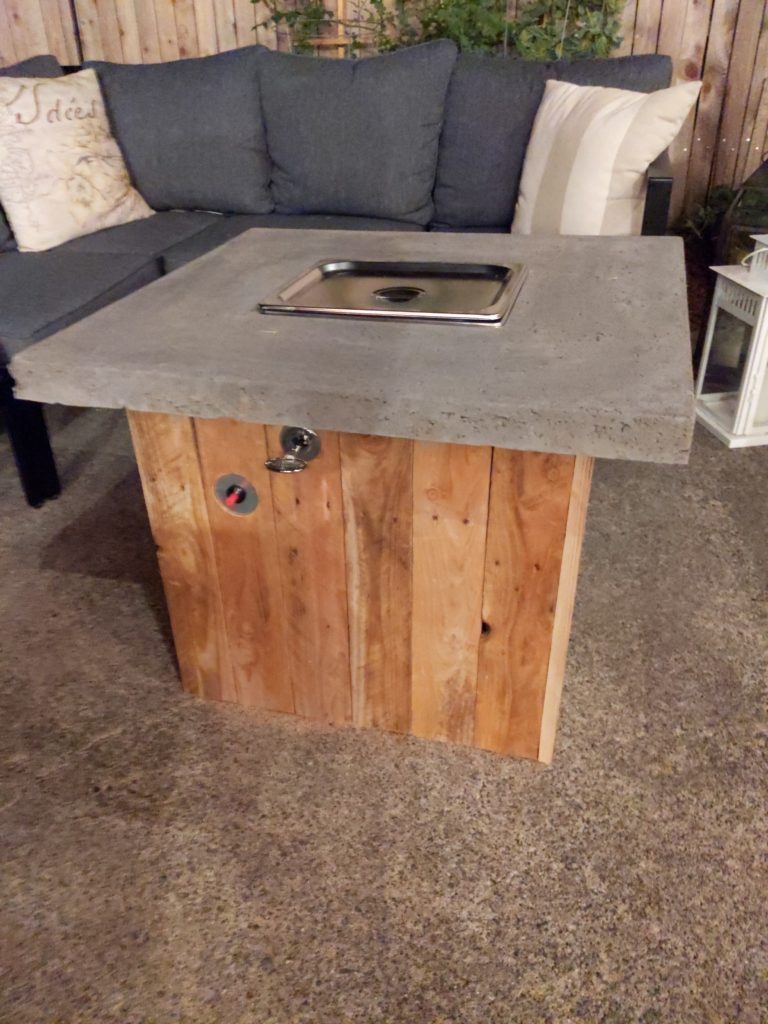
My top is still just resting on the base with no attachment, at some point I may try to anchor it with some adhesive or perhaps a few straps, but for now the weight alone keeps it pretty still. Once the top is placed you can drop you pan in and tighten down the gas extension from the burner to where it should point to easily get your propane tank in.
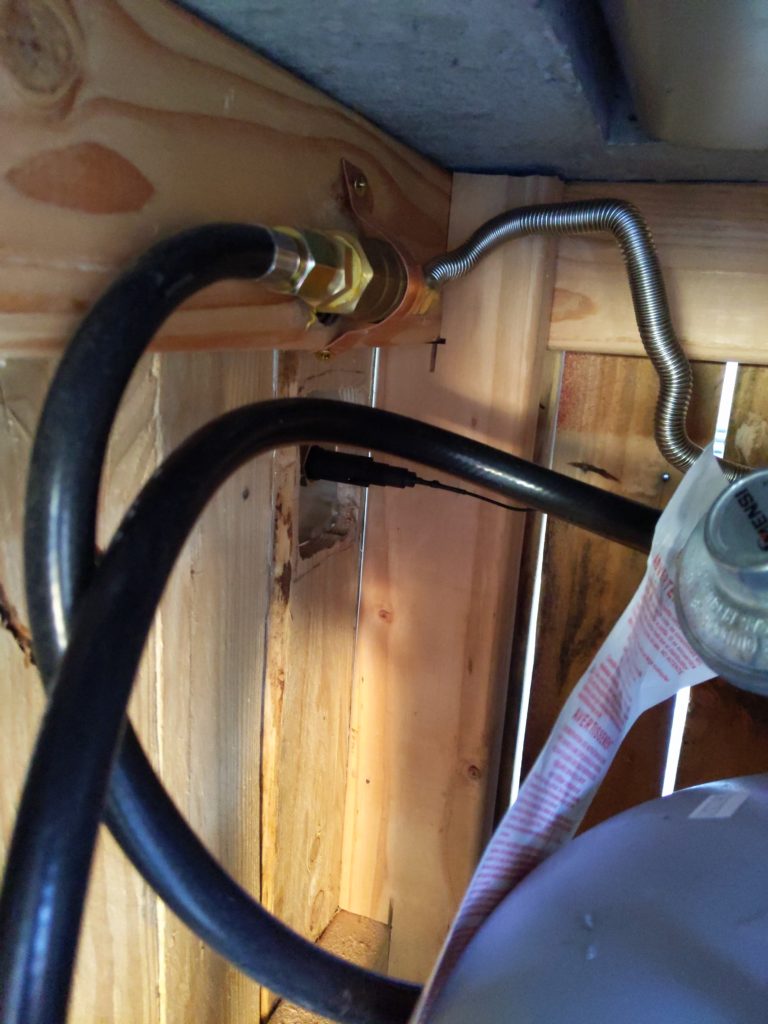
Drill a hole somewhere along the top or outside corner with enough room to connect either side of the gas hose and secure the valve to the interior frame. The depth of the 2×4 and pallet wood was just right for the shank of the key-valve. Tighten all your connections and use proper gas sealant where necessary.
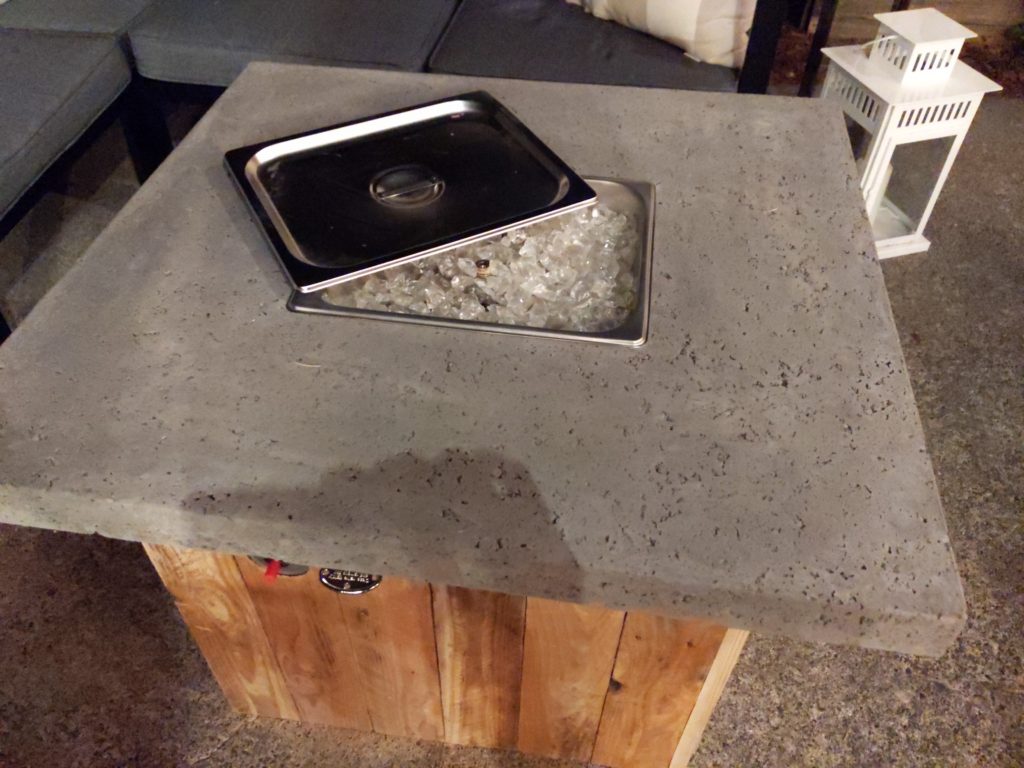
Pour in your fireglass – we went with white but you can get any color or lava rock that you want. I used about 3/4 of the 10lb bag to just cover the burner and have enough room for the warming tray lid to fit over the top.
(My) Next Steps
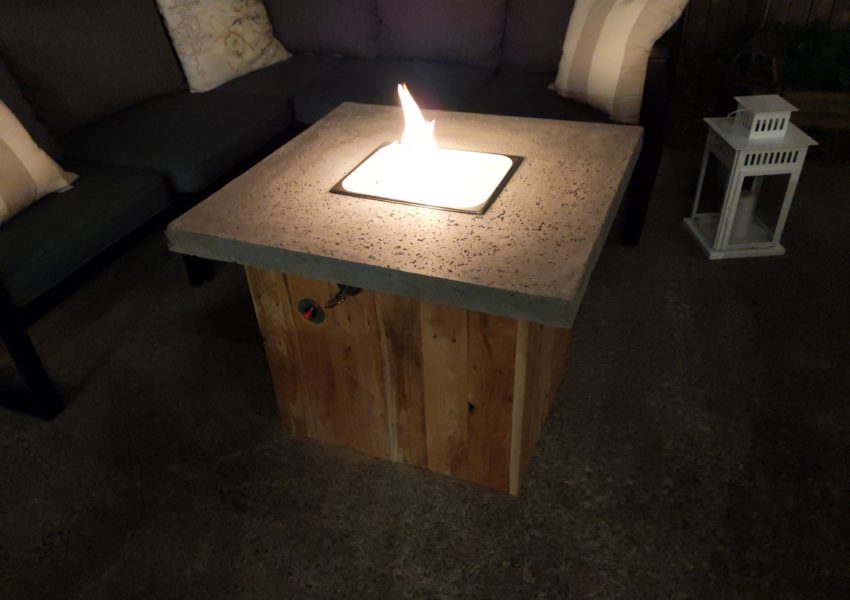
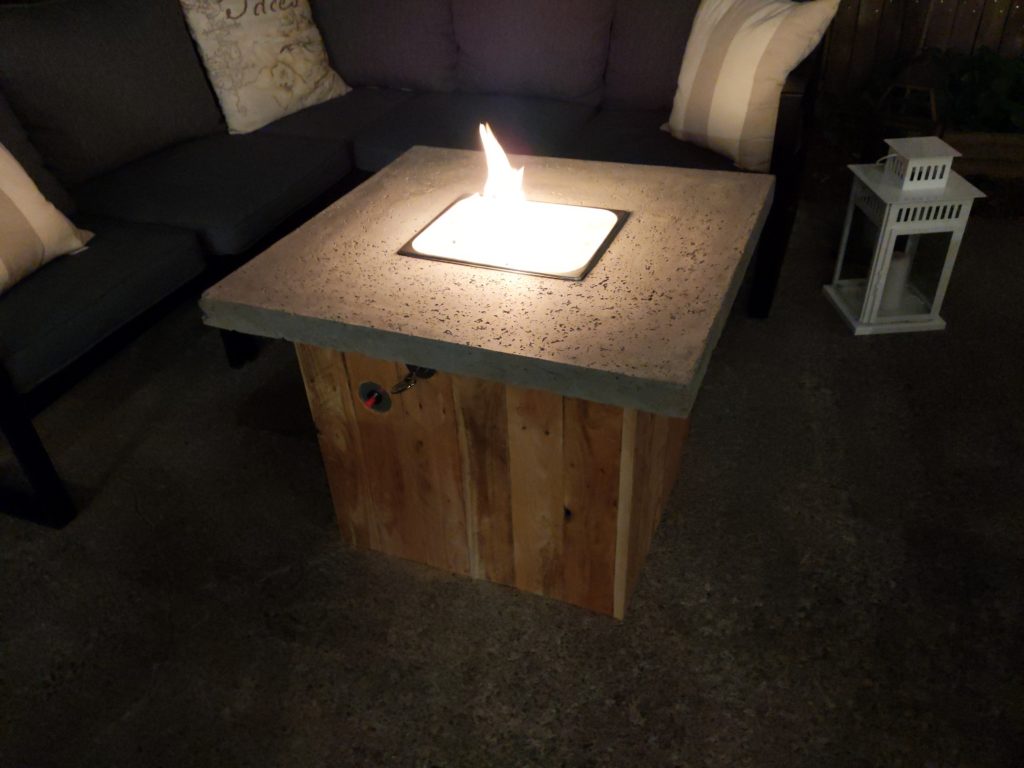
I haven’t quite achieved a fully finished product yet, but so far the fire pit looks great (enough) and works great (enough).
- Skim coat the concrete top to fill in holes and get a smooth finish
- I’m reading that straight portland cememt is best for this.
- I’ll go as thin as possible to not add too much bulk and keep it smooth
- Light sanding with a fine grit (400) sandpaper to really get a smooth finish
- Finish the top with a sealer (I’ve seen grout sealer used most often)
- The pizeo ignitor doesn’t put enough spark in the right places, I may try switching to electronic. Honestly the hassle of drilling the hole, and keeping the burner in the right spot aligned to the ignitor has proved difficult – and lighting with a stick lighter works easy enough.
- Finish my door with a few latches and maybe magnet latch on the top, with a handle.
- We may end up staining the base to match other furniture.
Summary of Considerations
I made a few mentions of things you could do differently, and I’ll summarize a few mistakes I made.
- I bought an all-in one valve with a thermocouple, I thought this would be cool for safety but if you don’t have a full pilot-light system it’s difficult to keep the thermocouple in enough flame around the fireglass. The valve also had limited safety features for kids… so I just swapped to the key-valve which looks much better anyways.
- The size I created is probably a minimum but using the same set of parts you could easily scale this up.
- These are standard 2 1/2″ warming dishes, if you used a full-size or other alternative size you can adjust your top size.
- There are many different burner sizes and types to match your pan size, you can also make your own to fit using copper. I originally tried to make a rectangular H burner fit, but the smallest size was still slightly too big to fit.
- Other gas sources, or externally placed tank could make this shorter.
- A 1 1/2″ slab thickness may only require 1 bag of cement. Alternative materials could allow you to make an even thinner top.